
For an in-depth guide, see: Building Startwork Templates: The Ultimate Guide
One of the key features of TiM is the ability for users to digitize their own forms and packets.
In TiM, the process of "digitizing" a form or packet is called "building a Startwork Template," and involves uploading a PDF of a document, and then adding Smart Fields to the document.
You can upload and customize your own Company Forms, or pull from dozens of pre-built TiM Templates.
Once forms are built, they can be compiled into packets.
Proper Startwork building procedure:
Step 1. Build your Company Forms within your Company Library.
Step 2. Compile your Company Packets.
Step 3. Insert your Company Packets into your Project-level Startwork Templates.
Step 1. Build your Company Forms within your Company Library
For more detailed instructions, see: How to upload & build Company Forms
It is best practice in TiM to build new forms at the Company level, so they can be easily pulled into projects as necessary.
Project-level Templates cannot be shared between Projects, and cannot be sent up to the Company level.
- From your Company dashboard, select "Company Library."
- Select "Company Forms."
- Select "Upload & Customize a Form." This will open the Builder.
- To build your form, follow this procedure:
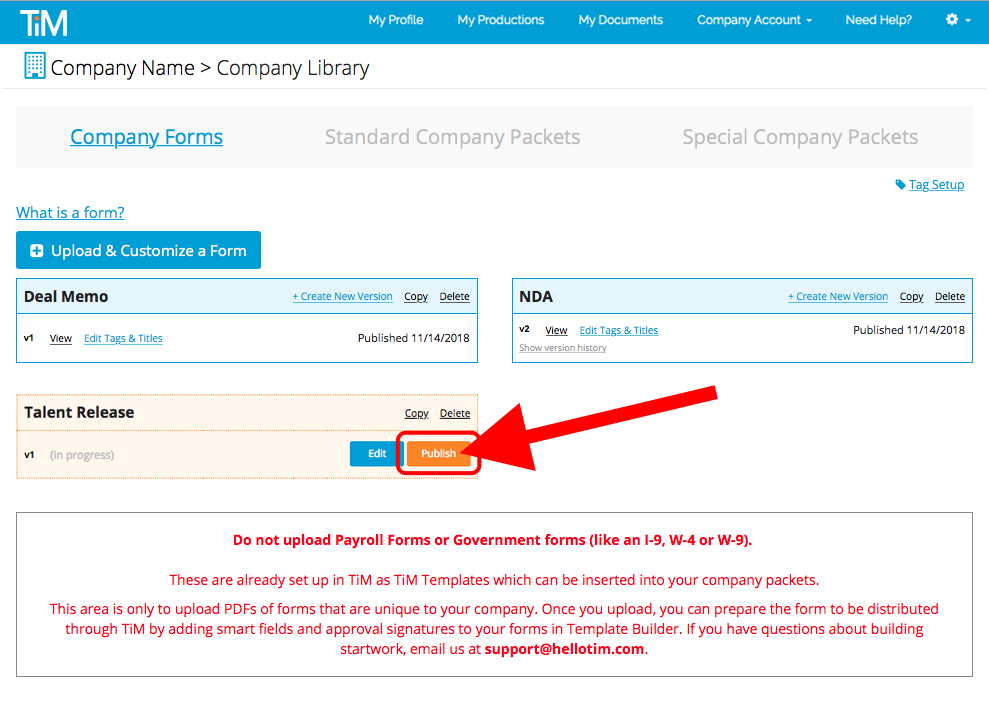
- Click "Save and Exit" to save your work and return to Company Forms.
- Click "Publish" to finalize the Template and make it available for use.
Step 2. Compile your Company Packets
In TiM, there are two types of packets: Standard Packets and Special Packets.
Think of your Company-level packets as your "starter packets." Your Company-level packets should contain forms that all Projects will need to distribute. You do not need to include Project-specific forms in Company-level packets. Project-specific forms can be added later, to the Startwork Templates within each Project.
For example:
- All Projects will need to distribute a start form, W-4, and NDA to its employees, so you will want to include all of those forms in your Company-level packets.
- A Project-specific Accounting Policies document should not be added to Company-level packets.
To Compile Company Packets:
- Select "Standard Company Packets."
- Select "Create" next to the type of Standard Packet you want to build (ie: Union, Non-Union, Union Loan-Out, Non-Union Loan-Out). This depends on the types of employees your company typically hires.
- Once the Builder opens, under "Insert Form(s)," select the category of forms you would like to insert into this packet. A second drop down will appear.
Pro Tip: Check the category "Payroll Forms." We have pre-built starter packet Templates available for use for Media Services and Cast & Crew! Keep in mind, these are just starter packets. You will want to review the contents and tailor the packets to suit your needs.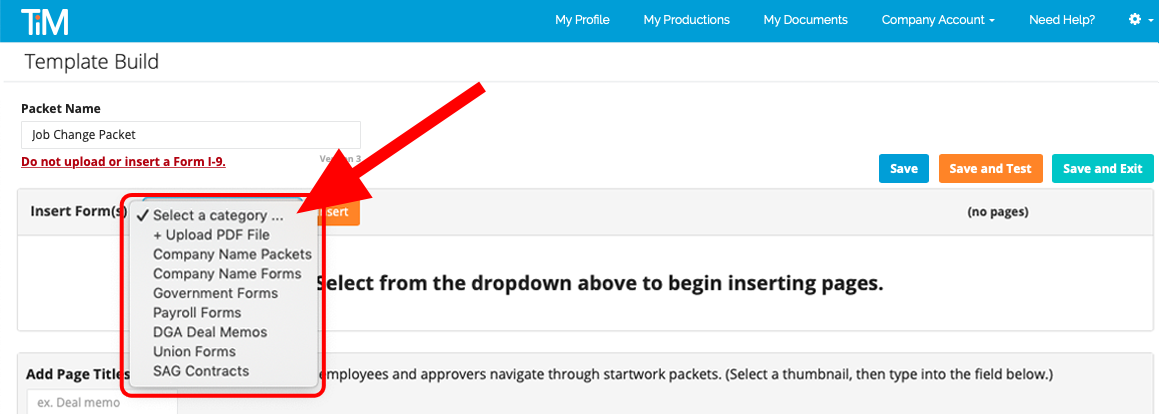
- From the second drop down, select a form to insert.
Troubleshooting Tip: If you do not see the Company Form you need listed in the drop down, make sure the Company Form Template has been Published. - Click "Insert." You will see the pages of the form populate as thumbnails.
- Repeat until all the forms you need are present in the packet.
- Add and/or revise Page Titles, Tags (AKA Export Tags), Viewing Permissions, Markups, Smart Fields, Signature Fields & Initials Fields as necessary.
- Click “Save and Test” at the top right of the screen to save and preview your packet.
- Click “Save and Exit” to return to the Company Library.
- Click "Publish" to finalize the Packet Template and make it available for use.
Step 3. Insert your Company Packets into your Project-level Startwork Templates
This step is easy-peasy once your packets have been built within your Company Library! All you'll need to do here is pull your Company Packets into your Project-level Startwork Templates!
For more detailed instructions, see: How to set up a new Project after it's been created
- From your Company dashboard, click into the Project.
If your Project isn't created yet, see: How to create a new Project - From the Project dashboard, select "Startwork Templates."
- Locate the packet type you want to build and select "Create" to open the Builder.
- At the top left of the Builder, under “Packet Name," you will see that your Packet has already been named. You cannot apply a custom name to a Project-level Standard Packet.
- Under "Insert Form(s)," select the category "[Your Company] Packets."
- From the second dropdown menu, choose the type of packet that you'd like to insert.
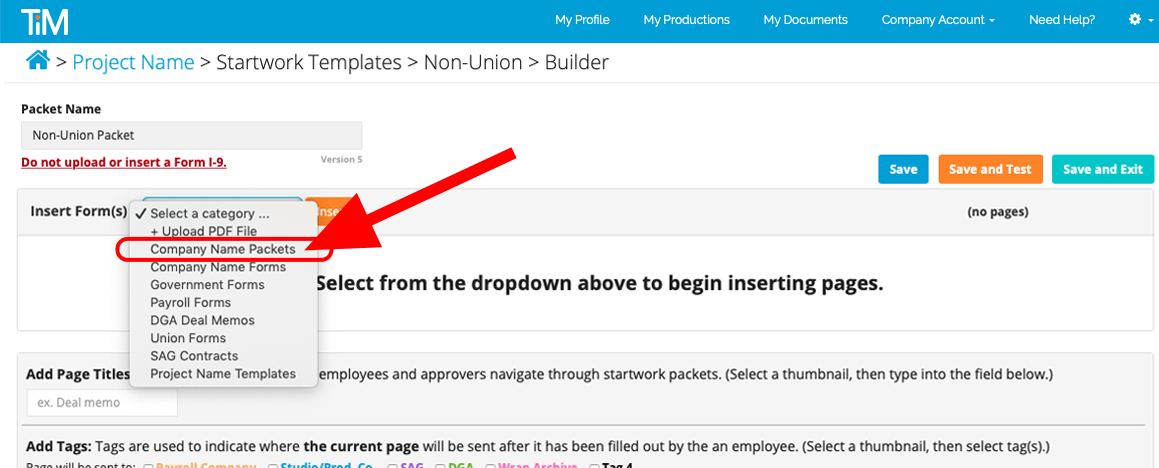
- Click "Insert."
- You will see the pages of the Company Packet populate in the Builder, with all Smart Fields, Tags, and Viewing Permissions that were pre-set at the Company level.
- If necessary, you can insert additional forms from other categories.
NOTE: If you choose to modify this packet at this point, understand that any changes made at the Project level will only be reflected within this Project, and will not sync with Company-level Templates. Project-level Startwork cannot be shared between Projects, and cannot be sent up to the Company level. Startwork built at the Project level will only be available to that Project. - Double check that all the needed forms are present and that the Page Titles, Tags (AKA Export Tags), Viewing Permissions, Markups, Smart Fields, Signature Fields & Initials Fields are applied as needd.
- Click “Save and Test” at the top right of the screen to save and preview your packet.
- Click “Save and Exit” at the top right of the screen to save your packet and return to Startwork Templates.
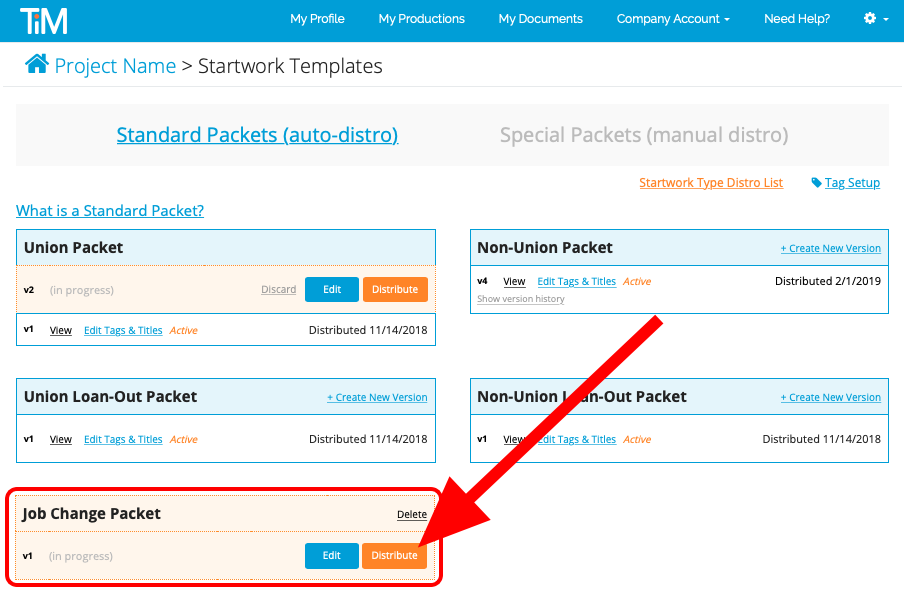
- Click "Distribute" / "Publish" to finalize this Packet Template and make it available to be auto-matched to employees.
Pro Tip: You will know your packet is finalized because the Packet will be highlighted in blue instead of orange.
NOTE: Packets that are not finalized will not be available to auto-match to employees. If an employee is invited, but their Packet type is not finalized yet, they will see a note in their TiM Account that reads “Your Startwork packet type has not been built or published yet”, and in Crew Management you will see "No Packet Assigned!" Once the packet is finalized, employees will receive an email notification that says “Your Startwork is now ready to be completed!” and you will see the name of the packet appear in Crew Management.
Read Next:
Comments
0 comments
Please sign in to leave a comment.